Creating a formation of machines
iAbstract
We will continue in this tutorial with topics on mass creation of collections according to a template. This time the goal is to load an already prefabricated machine and create a larger formation from it. In doing so, we can influence the velocities and angle of each copy. And to make the whole thing a bit fun we construct a world in which countless "interceptor" machines chase a large object.
What you will see
1. Creating a new simulation with appropriate parameters
As a first step, we create a new simulation. With one exception, we can use the settings (size, CUDA settings and simulation parameters) from the previous tutorial. The only difference is that we want to readjust the simulation parameter for the sensor range. We will address the reasons for this later.
To this end, after we have opened the dialog for creating a new simulation, we click there on simulation parameters. The parameters are arranged hierarchically by nodes and sub nodes. We search in cell function properties → sensor for the parameter named range and set its value to 250.

We confirm everything with OK and have a new simulation generated.
2. Inserting an interceptor machine
In the absolutely empty world we have created, we insert a collection from the standard examples supplied. In this case, it will be a machine that scans its environment for large objects and, once it has detected one, accelerates in its direction.
Adding a collection is done via the Load menu item under Collection. After selecting the file ./examples/collections/interceptor.col, the interceptor machine is added to the center of the view. Since it is a relatively small cell cluster consisting of 6 cells, you will only see a tiny blue-white spot at the default zoom level. By zooming in, the editor will open automatically and you will be able to explore the precise structure. To display additional information, we activate the menu item Cell info under View.
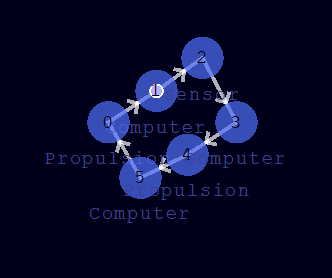
The cell structure is topologically a ring and includes sensor, propulsion and computer functions. You can also see a token circling around the cells in the direction of the arrows. The cells distribute the overall task as follows:
- The sensor scans its environment in a radius that we have set under the simulation parameters. It gets certain inputs from the token (e.g. control commands and mass size information) and generates output data, which are then stored in the token memory. If the sensor has detected a mass with a certain size, it returns angle, distance and mass.
- The computers calculate from the output values of the sensor suitable control commands for the cells with propulsion functions.
- There are two propulsions: One is there to dampen the rotation (via suitable control commands), while the other takes course to the position of the detected mass (if one was found by the sensor).
3. Generating copies arranged in a formation
We zoom out to a zoom level of 2x and create a formation of many interceptors. To this end, we open the Grid multiplier under Collection and set the values (except initial position) as follows:
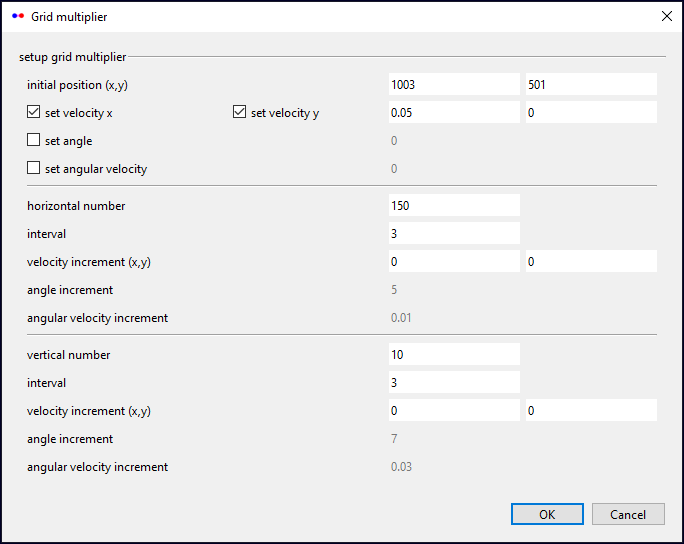
This dialog needs some explanation. It is used to duplicate a collection, where the individual copies are aligned on a grid. Analogous to the random multiplier, a collection is needed here as a template to be multiplied. This template is always taken from the current selection. If we load a collection, it is automatically selected and we do not have to do anything else. Consider the following figure for the different settings we can made:
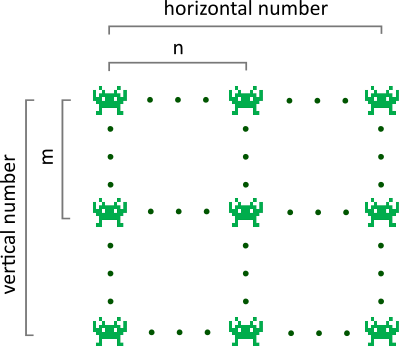
- The position (x, y) of a (n, m)-copy is given by
x = [initial x-position] + (n - 1) * [horizontal interval] and
y = [initial y-position] + (m - 1) * [vertical interval].
- It is also possible to change the angles and velocities if the corresponding check box is set. In this case, for instance, the x-velocity of a (n, m)-copy calculates as
[initial x-velocity] + (n - 1) * [x-velocity increment] + (m - 1) * [y-velocity increment].
An analogous formula is used for the y-velocity, the angle and the angular velocity.
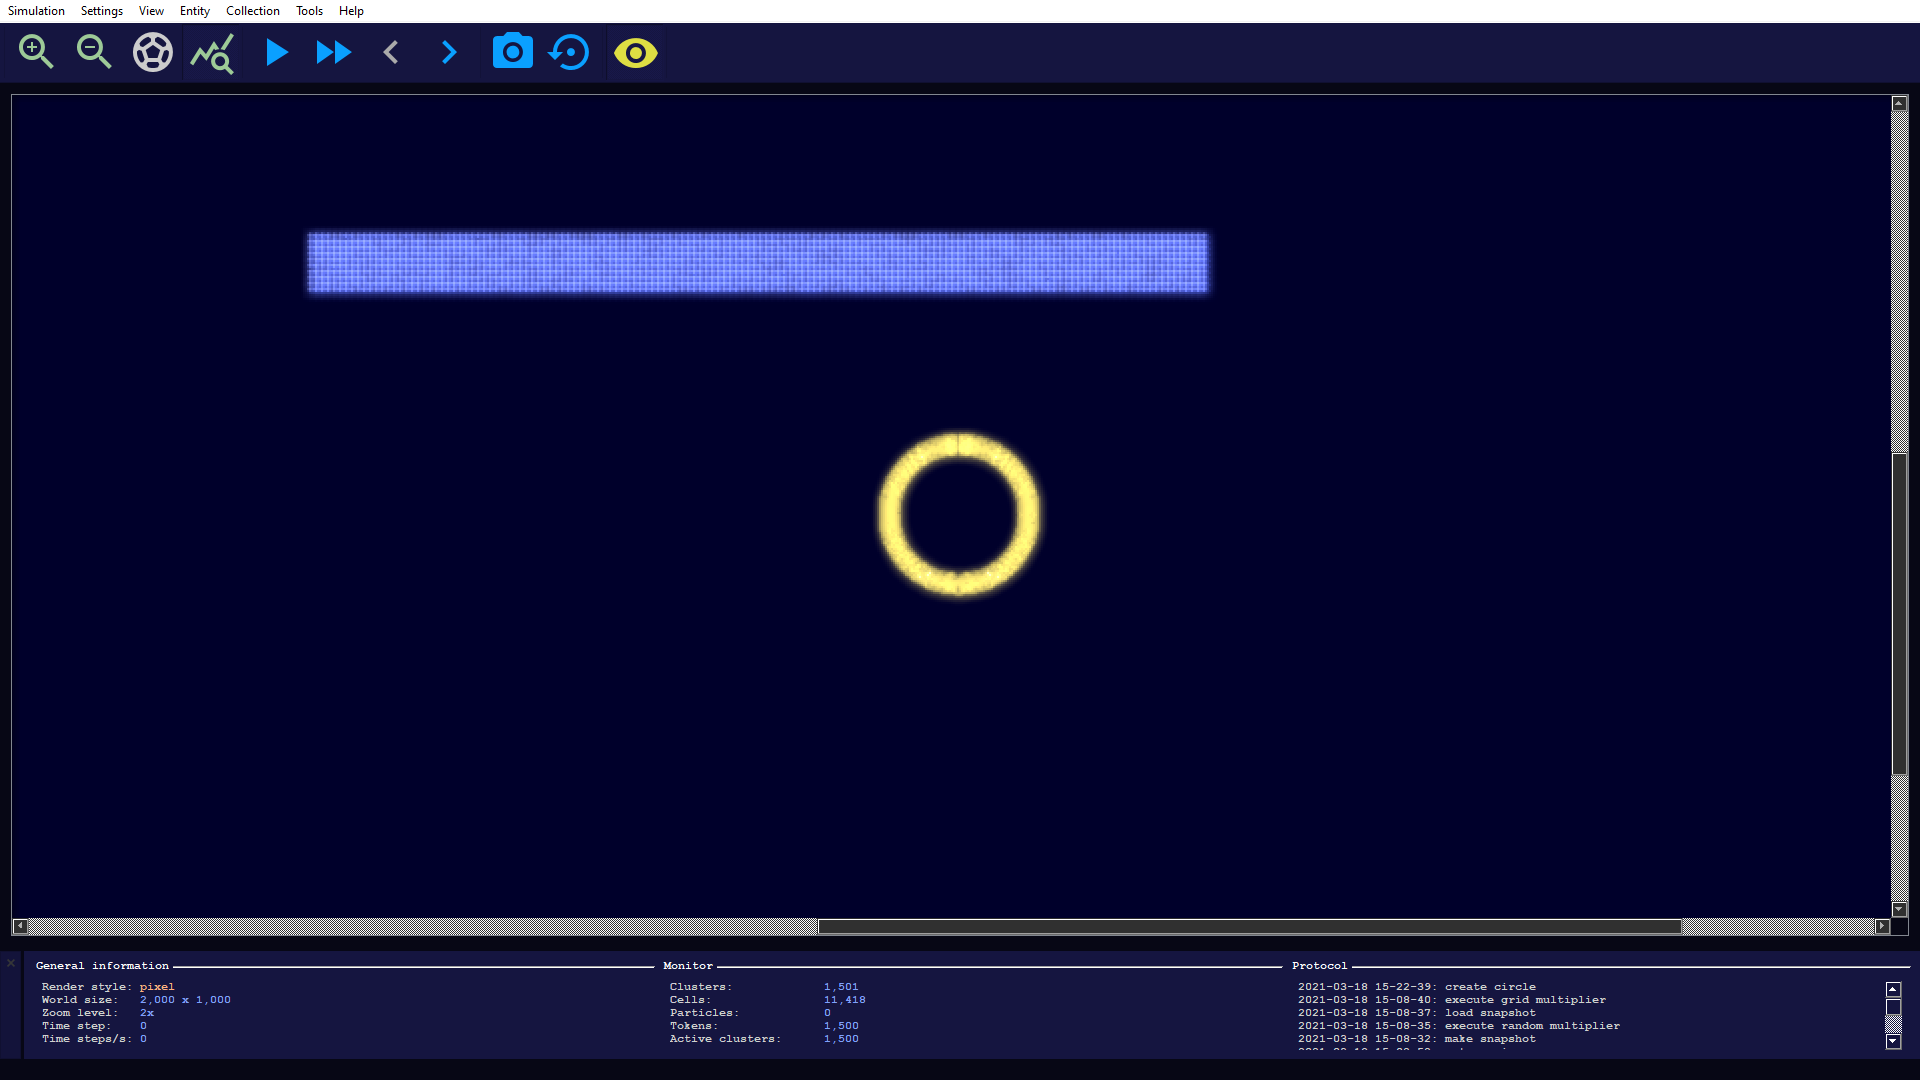
After confirming with OK we should see the following:
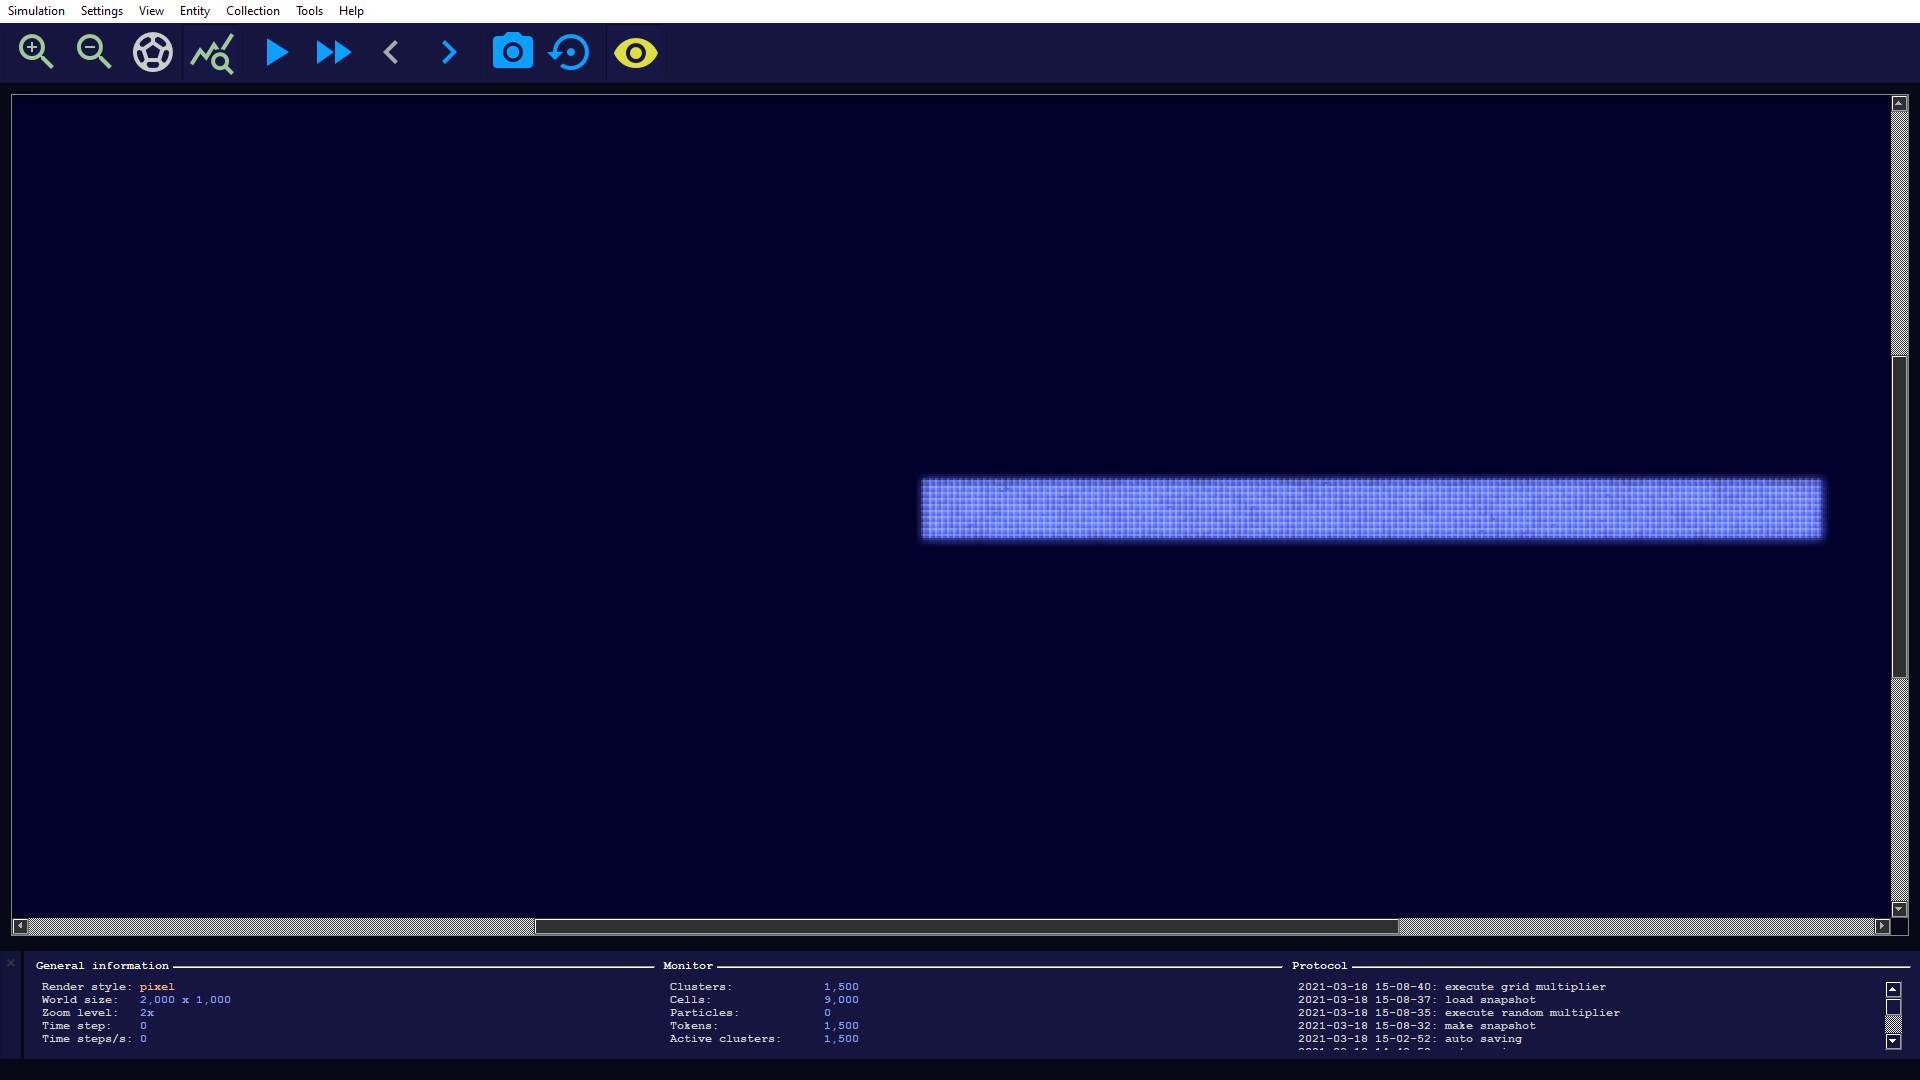
The 1,500 machines are so closely packed that we can hardly distinguish them!
4. Adding an attractor
As mentioned earlier, our machines are looking for large objects to target. So we should create one that serves as an attractor!
For this purpose we scroll down a bit to the right (but not too far, because the sensor range of our machines is limited by 250 units), open the dialog to create a disc and insert the subsequent parameters:
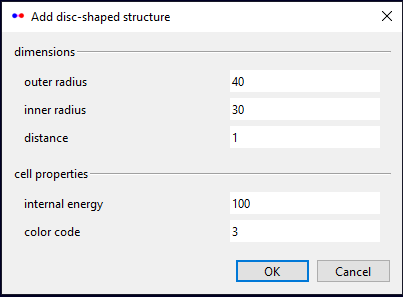
And voilà! We have put together our little world and can now start the simulation.
It is a lot of fun to experiment with these machines. For example, you can choose a much larger number (adjust CUDA settings if necessary) or place multiple objects.
Created with the Personal Edition of HelpNDoc: News and information about help authoring tools and software